NEBULUM.ONE
How to Build Custom AI Applications with a Bubble Template
Your Complete Nebulum Template Walkthrough
Ready to build your own AI application without coding? In this comprehensive guide, we’ll walk you through setting up Nebulum’s powerful AI template for Bubble. This template lets you connect to any large language model—from ChatGPT to open-source alternatives—and create a fully functional AI chat application with memory, user management, and beautiful markdown formatting.
Watch the video below for a visual walkthrough, then follow along with the detailed steps in this post.
AI LLM Template for Bubble.io
In this comprehensive guide, you’ll learn how to use Nebulum’s AI template for Bubble. What this template does is it allows you to connect to virtually any AI large language model (LLM) that exists so you can run your own custom AI application (including Claude, ChatGPT, Mistral, DeepSeek, Gemma, Qwen and others). In this guide we’re covering the basics of getting the template working, but in future posts we’ll cover other topics like setting up retrieval-augmented generation (RAG) and I’ll even show you ways to train your own custom models without having to write any code.
So first of all, here is a quick overview of what we’re working towards in this introductory guide. As you can see, the demo comes with two main pages. First, there is the ‘index’ page which acts as your landing page where you can write about the tool you’re building.
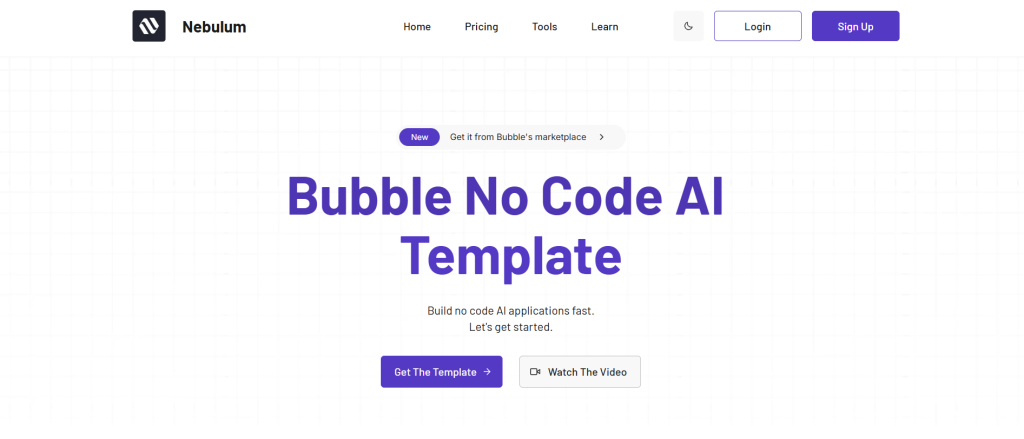
This page comes out of the box as being fully responsive. Out of the box, the login and signup systems work, but in the future, if you wanted to add a paywall before people could access your application, that’s totally possible to do as well. But for now, let’s just keep the signup process open to all.
After signing up and logging in, you’ll be redirected to the ‘conversation’ page.
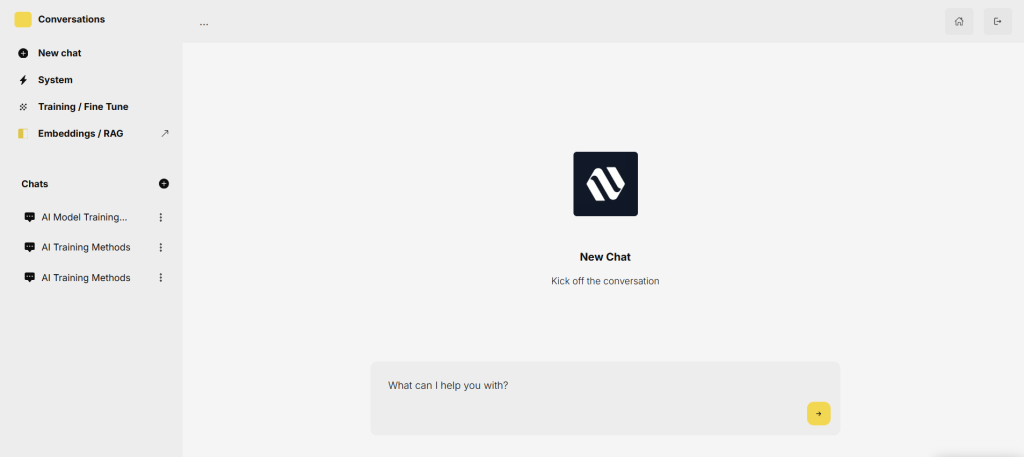
This is the second page within this bubble template. This is where the LLM engine lives. Like the main index page, this conversation page is fully responsive. It’s also fully customizable and you can change the colors, fonts and so on.
What makes this page interesting is that it does some things which are kind of challenging to make bubble do. So for example, here we can show streaming markdown text. This is important because you want your AI responses to look beautifully formatted, with nice headings, subheadings and so on. Nebulum’s AI template can handle this with ease. Second, we’re streaming markdown, just just raw text, which means we can do things like show nicely formatted tables in our response.
Not only can our template handle nicely formatted regular text, but you can also ask coding related questions and the template can show code windows allowing users to both create, and then copy and paste code from within your application.
Built-in Conversation Memory and Chat Storage
This template also comes out of the box with the ability to remember an entire AI chat conversation. This means that each time you ask a question, the AI uses your conversation up to that point as context. This allows your application to have a working memory, so you don’t have to ask one-off questions.
“This allows your application to have a working memory, so you don’t have to ask one-off questions.”
Similarly, we’ve built the template so that every time you start a new AI conversation, that conversation is stored as a chat in the database which can be accessed by clicking on any of these chat options over in the left sidebar.
You can also rename your chats, add custom system messages or remove the chat from your database by clicking on any of these buttons here.
Understanding AI Roles: Assistant, User, and System
This template also comes with 3 built in user roles. First, we have the user role, which will be you or the users using your application. The assistant role is the AI you’re chatting with and the system prompt is a prompt which outlines how you want the AI to respond. Here you can do things like setup your chat bot’s tone or voice. Within the template you have the global system prompt in the left sidebar under “system” which will be the default system prompt for all of your chats. However, if you wanted to override this global system prompt for any individual chat, you could do that by clicking on the individual chat and then setting the system prompt for the individual chat.
Getting Started with Your AI Template Setup
This template can do much more than all of this, but that will give you a top level overview of what we’re working towards in this quick guide.
Okay, after getting the template, to make this work on your end, the first thing we’ll need to do is we’ll need to connect to a serverless LLM model. This will allow us to directly connect to any LLM through a simple API call.
As I mentioned previously we can connect to any LLM we want from ChatGPT and Claude to Deepseek, Mistral, Qwen, Llama or even Google’s Gemma.
In this guide, we’re going to get started using an open source model, because from a performance standpoint they are on par, sometimes even outperforming their closed source cousins, and they are also much cheaper to run. So in order to access these open source models without having to run expensive hardware on our own, we can use serverless options such as together.ai or fireworks.ai. Let’s begin by using together. All we need to make this LLM template work right now is a free and easy to use API key, so let’s get that now by going over to together.ai and signing up and logging in. When you sign up for together, you’ll get some free credits, allowing you to test out these open source models.
“From a performance standpoint they are on par, sometimes even outperforming their closed source cousins, and they are also much cheaper to run.”
Okay, once logged in, all you need to do is click on your avatar, then go to settings, then click on ‘api keys’, and then simply copy this api key. If you don’t have an API key created yet, you can create one from your main together.ai API page.
Once the API key is copied, head back to the bubble template and then click on plugins in the sidebar, and then click on “API connector”. From here, look for the ‘together’ API call and then you’ll see that we have the authentication set to ‘private key in header’. So under ‘key name’ we have this set to ‘authorization’ and the value is simply the word ‘Bearer’ spelt with a capital ‘B’ and then a space and after that you can paste your API key. It’s essential that you don’t just copy and paste your API key here without the word Bearer and a trailing space. So in the end the value here will be ‘bearer – space – and then you can paste your API key after that.
Once you’re done that, you’re done, you can now create a new user in the database, or signup from the front-end with a testing demo account and then once you login you can start asking the AI questions and it will be able to respond. Once you run out of free credits, you can go back to your billing page and buy more credits from together.ai.
Advanced Configuration and API Settings
Okay, and just one more thing before moving on to the next guide. The way this template is setup is through two different API calls. We found that we got better and more reliable responses by taking this approach. So again, if we go over to the API connector plugin, and we examine the together AI API, you’ll see that we have two calls here. The reason for this is because we found it optimal to change our call slightly based on if the chat was a new chat or an ongoing chat. For example, for a new chat, there is no chat history yet, and for that reason we found we received stronger responses if we left out the message history field until it was required. So when you start a new chat within the application, you’re hitting this API endpoint. However, once a chat is started and the conversation contains history, you’re hitting this API endpoint. Both calls are clearly labeled. This one is called ‘AI – New Chat First Question’, and the second one is called ‘AI – Ongoing Conversation’ and in this API call you’ll see that we have the dynamic ‘messages’ field allowing us to store the chat’s history up until this point.
So this means these two API endpoints are called by clicking on two separate buttons. So if we clicked on the design tab, you’ll see these two buttons in your elements tree under the ‘group question section’, but here you’ll see two groups which act as buttons which are designed identically, but trigger two different workflows. So a new conversation is kicked off by clicking on this button called ‘group new conversation’ and the workflow for an ongoing conversation is activated once this button for ‘group ongoing conversation’ is clicked.
In the backend workflow section, we’ve also color coded this to make it easier to see. The new conversation workflow is this green option here, and the ongoing conversation workflow is set to yellow.
Switching Between AI Models for Optimal Performance
And lastly I just wanted to tell you how to switch out models. So if we jump back over to together.ai, we can click on ‘models’. From here, let’s filter to include only chat models. By default we’re using deepseek in both of our API calls, you can see that, by going over to the API connector plugin and looking at the model name. Currently we’ve found the performance is the best using this model, however you can switch it out for other models by going to together AI and then click on any of these chat models. For example, if you wanted to use the mistral model, all you’d need to do is click on mistral within together.ai, then scroll down the page a bit until you see the ‘run interface’. From here you’ll see the model name. Simply copy that model name, then go back to your app, paste it into your api call to the right of ‘model’ and then initialize your call. And then, that’s it. Now you’re running a new model.
What’s Next: Advanced AI Features and RAG Implementation
Again, there is a lot more to this AI and LMM bubble template. But now you know enough to get you started. In the next guides, I’m going to teach you how to use custom trained models within your application and how to implement RAG technology for vector database queries into your application. Incredibly interesting topics which will allow you to supercharge what your app is capable of doing. So if you’re reading this on our blog, simply check out our other tutorials in this series. Or if you’re over on the main demo page for this template, you can click on ‘learn’ in the top navigation bar to view our other tutorials.
Hope you found this valuable and I’ll see you in the next guide.
Build Systems That Run in the Real World
Design and deploy durable hardware and software systems, data pipelines, and intelligent infrastructure that operate reliably without constant oversight.
![]() We build with heart
We build with heart
LET'S TALK
Discuss Your
Hardware & Software
Needs With Us
OUR NEWSLETTER
MACHINES
Embedded Systems
Machine Intelligence
Machine Learning
Sensor Systems
Computer Vision
@NEBULUM 2026. ALL RIGHTS RESERVED
